Reporting on Different Types of Employed Individuals
On this page:
- Adding Employment Information to a Template
- Viewing Employment Details
- Focus on a Single Employment Type
- View Individuals Grouped by Employment Type
- Include Employment Type Code in Export
- Include All Employment Details in Export
- Explore Employment Data Details
It's common for compliance specialists at firms to wonder “How do I report on my NRF people?”. For people not familiar with that acronym, it stands for non-registered fingerprint individual.
In FINRA Gateway Reports, information on if an individual is an investment adviser representative, non-registered fingerprint individual, registered representative/principal, owner/officer, or other employment type is contained within the Employment Type Code field. This example will cover how to view the employment type of individuals at your firm and create templates and exports using Employment Type Code.
Adding Employment Information to a Template
With the Active Individuals Template open, the Employments subtable isn’t shown by default. Open the Columns tool to add the Employments column by selecting the check box next to it.
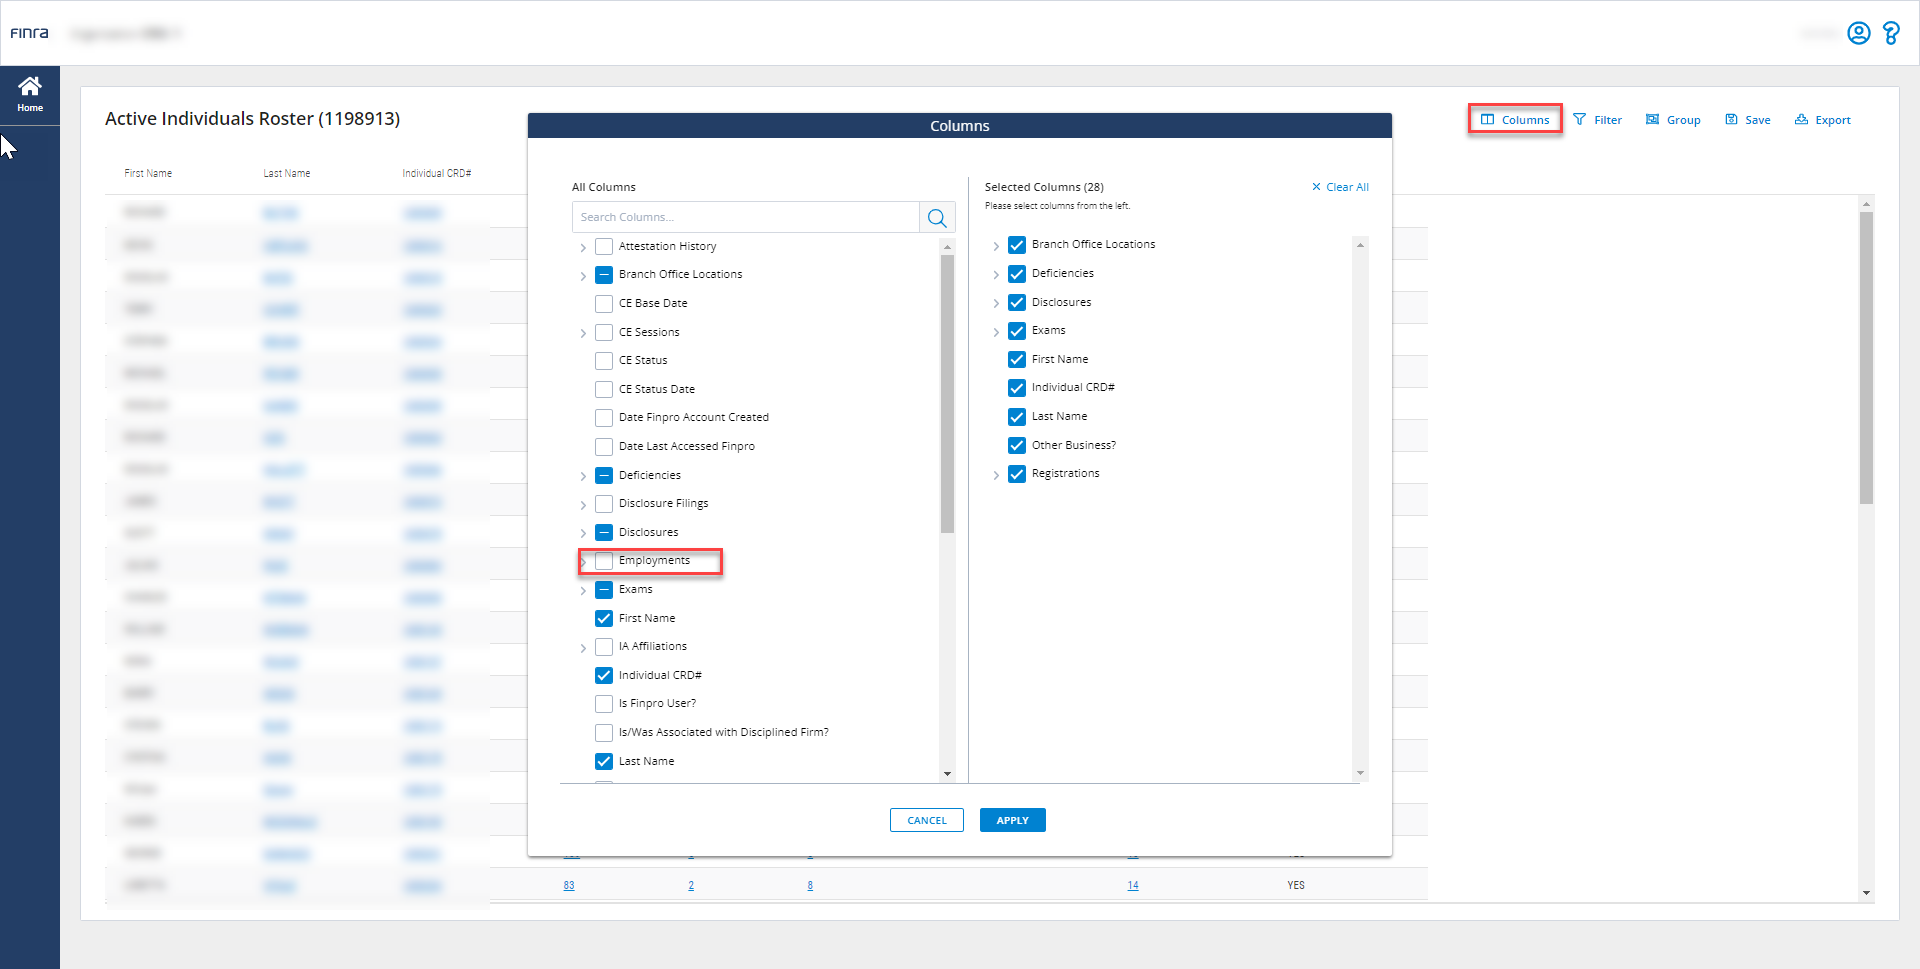
You can remove columns by unchecking them. When you have the columns you want included in Selected Columns section, click Apply.
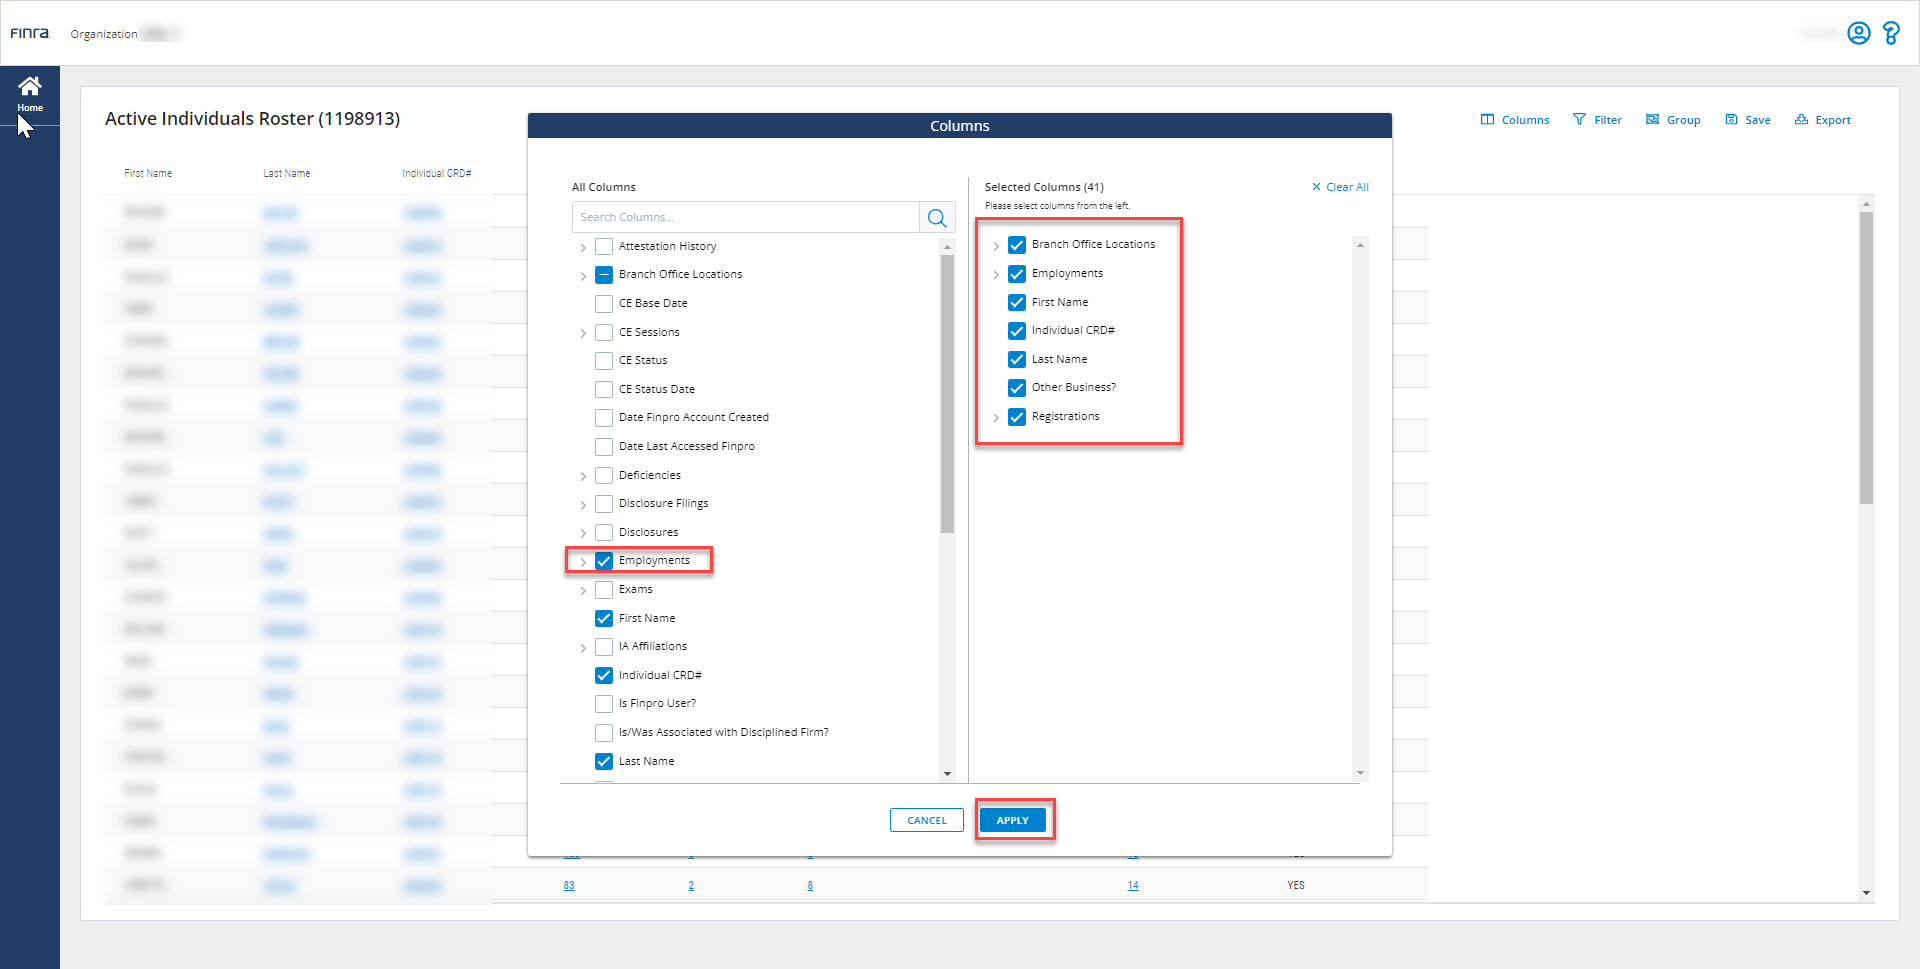
When you select the main Employments column, you automatically select all the columns included in the subtable. Click to expand the Employments section to remove any columns you don’t need included in your template.

Viewing Employment Details
To view Employment details, click the number in the Employments column to expand the subtable. Depending on how many columns you included in the subtable, you may have to scroll horizontally to see them all.
Focus on a Single Employment Type
To focus on one type of employment, such as NRF, you can use the Filter tool. With the Active Individuals Template open, click on the Filter tool and search for Employment Type Code. Select the Employment Type Code filter from the list that appears.

From the Employment Type Code filter, you can select an employment type you want to report on, such as non-registered fingerprint individual.

If you want to select another employment type to include in the report, you can select Add Filter Condition and repeat the process with another selection. When you have the selection(s) you want, click Apply.

When you have applied the filter, a blue tag will appear showing the filter condition you applied. Click Done.

The resulting view will show you only NRF individuals. You can click Save to save the setting as a Custom Report.
View All Individuals Grouped by Employment Type
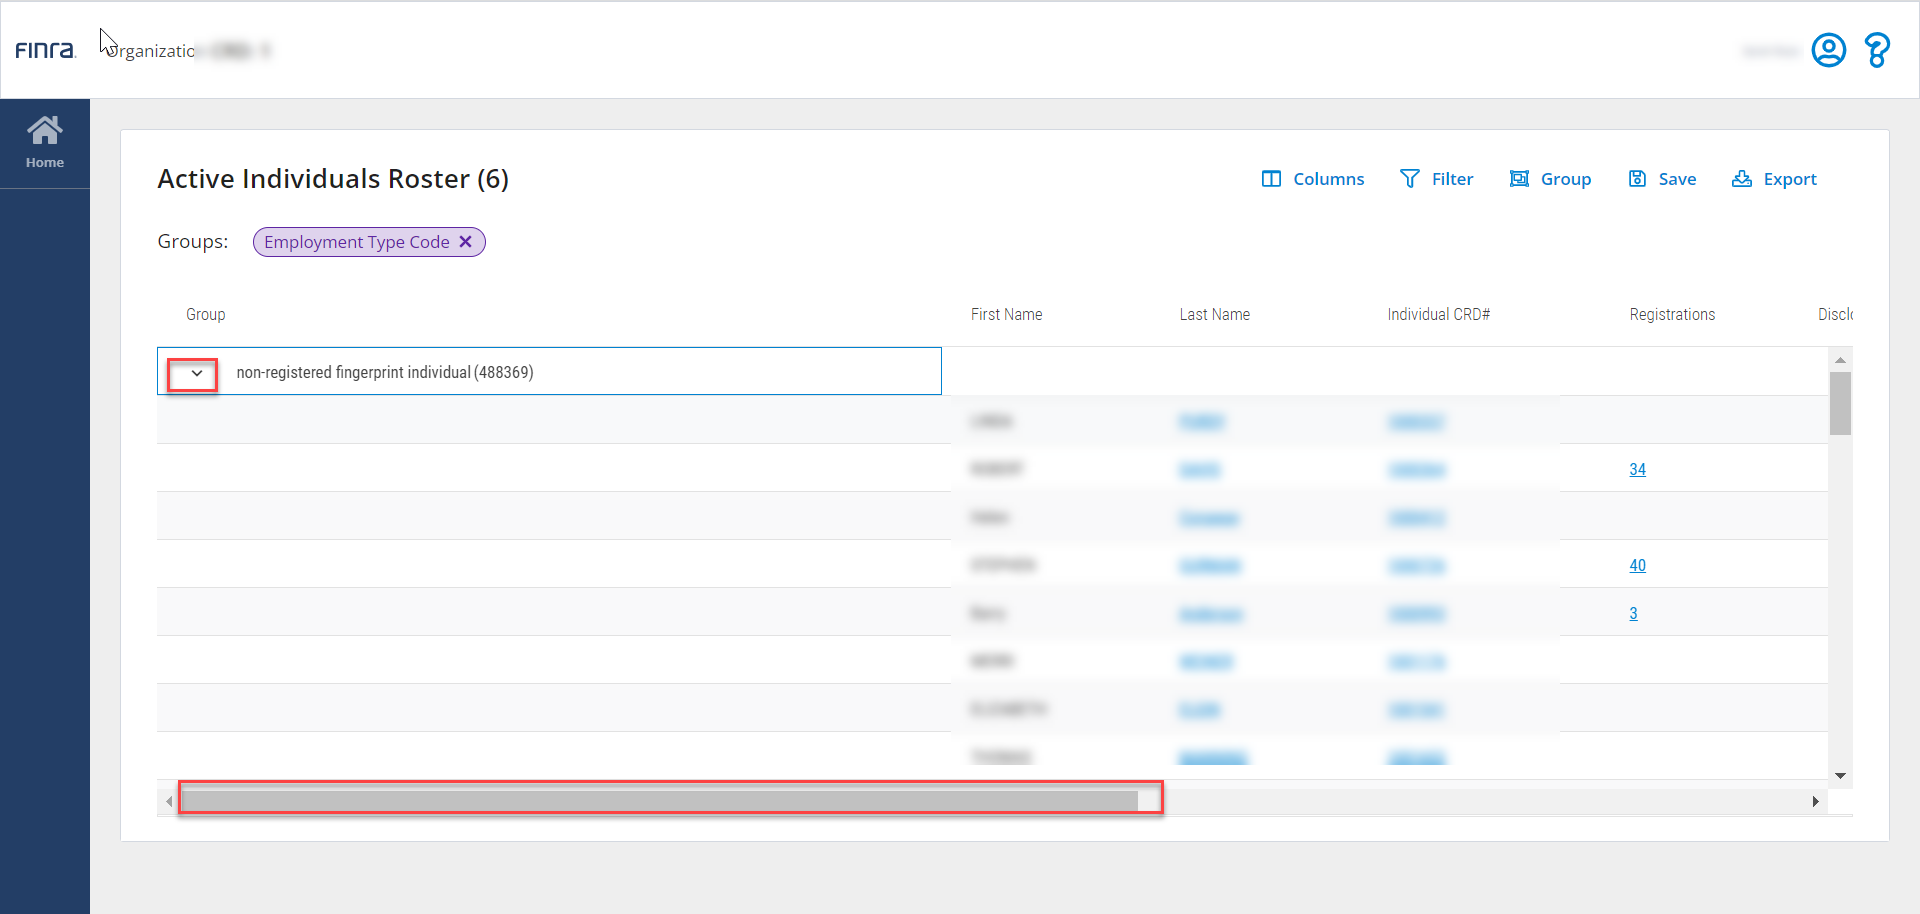
If you want to see all individuals in your firm based on their employment type, you can set up a template that categorized individuals by Employment Type Code using the Group tool.
With the Active Individuals Template open, click the Group tool. Within the Group tool, search on Employment Type Code. Select the checkbox next to Employment Type Code and click Apply. You will see the Group option appear in the right side of the Group tool Click Done.

With the Employment Type Code Group applied, individuals at your firm will be nested within their employment type with a count of how many individual are within each group. Click on the column and drag to resize to see the full employment type name.

Click on an employment type to expand and view individual details. Use the horizonal scroll bar to see all columns in the group.
Include All Employment Details in Export
With the template open that you want to export, click the Export tool. Within the Export tool choose the Advanced Export option. From the options appear, check the Employment subtable.

The file will include all employment details in a single row. Wait for the file to download and pick it up from the main Reports page in the Export Ready for Download section.
See Export Your Data the Way You Want It for details on using the Export tool.
Include Employment Type Code in Export
There may be situations when you want to export another subtable but also want to include Employment Type Code. In that case, first Group the template by Employment Type Code and then export. That will allow you to include the Employment Type Code as a column value while also allowing you to use Advance Export to include the other subtable you want to include in your export.
Explore Employment Data Details
For more information on the Employment data FINRA Gateway Reports includes, reference the Individual Data Dictionary.